Saturday, January 10, 2015

Journey into Africa - The People

Its been a while! I am sorry for the delay but its been pretty busy; From a new baby in the house to a hand-fasting and moving! Thankfully things are calming down and we can start blogging our adventures once more.


Story Time

The first two weeks of January we are focusing on AFRICA, and our reading list reflexs that. Some of the stories we have read a this week have been:

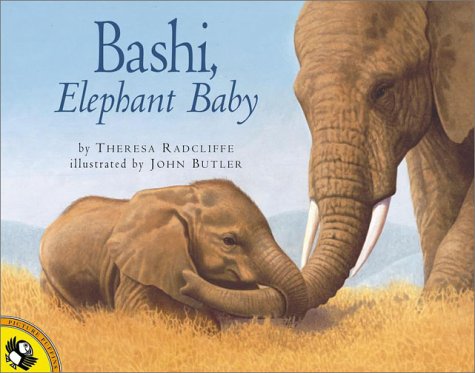
We also listened and watched Youtube videos on some African Folk tales such as:

African Folktale - Anansi
Why do mosquitoes Buzz in Peoples Ears
How did the Leopard get it's spots


Arts and Crafts / Social Studies / Cultural Studies

African Tribal Mask:


We explored the internet to discover the unique styles of African masks. We talked about the meanings and uses for these beautiful art forms. He enjoyed watching videos of tribal gatherings where these masks were worn in intricate dance and ceremony. His favorite was one from West Africa, and he used it for inspiration as he created his own.

Needed items:

  1. Cardboard 
  2. Paint
  3. A means to cut the cardboard

How to:
  1. Cut the cardboard into a shape of your preference
  2. Paint your own details
  3. Enjoy!

African Beaded Neck Rings:


This is another activity where I can't cite a particular website or tutorial. So we ended up googling and discovering together. We found that some cultures have very simple rings while others have detailed patterns. We learned that the necklace or neck ring that a person wore can tell others many things. They could denote if a person was a warrior,a mother, ready to marry, a child, the mother of a warrior or married.  We looked at lots of pictures with different styles before Chandler was ready to make his own. His favorite was of the Maasai woman that I shared above his craft.

Needed items:
  1. CardStock or a paper plate
  2. Paint
  3. A means to cut the material

How to:
  1. Cut the center out and make one cut around the edge so that you can 'open' it to put it on the child.
  2. Examine other examples and discuss what your design might say about you.
  3. Paint your own neck ring
  4. Enjoy!

Arts and Crafts / Animal Sciences 

Safari Observation


Since going to Africa is out of our budget we went on a safari of our own. We dumped out every animal we had (a crazy amount!) and Chandler helped sorted the animals that lived on the African continent into their own group. Next the turned over a bucket and placed one animal on the very top and used his science eyes to observe the animal. How many legs did it have? Did it have sharp teeth or dull teeth? Did it have camouflage? If so what about it's marks give you a hint about where it lives? After he observed the animal on his safari - he would document his findings by illustrating what he saw. He isn't one to sit for long but he didn't budge for almost an hour (by choice!) as he took down the details and moved from one animal to the next! 

Science / Cooking Skills

Make a Gingerbread House:
 

Absolutely nothing to do with Africa! More like Momma taking advantage of the post holiday clearance items. I wanted to help bolster his independence and help him gain those ever important life skills so no matter how badly I wanted to pipe on those perfect lines and keep a pattern in the gumdrops - I refrained. Instead I helped him enough by getting it together with out falling over and let him go to work. He had a BLAST! He loved showing everyone our gingerbread house and telling them he did it on his own! So many lessons are learned that don't come from a book!

Phonics / Spelling / Fine Motor Skills


Sight Word Bingo

Easy Peasey and lots of fun. I made these in just a few minutes the night before. I cut a piece of cardstock in fourths and drew lines on them. I wrote each sight word in the space with a pencil so that I can change them upon mastery. ( I have stopped thinking week to week. One of the best parts about Homeschooling means you can move forward as your child masters a skill - not force him to keep up with some imagined scale) I cut up some colored note cards with craft scissors for fun covers. I made four cards for them to choose from. One set has four words, while the other set has eight. Giving Chandler the option to chose the level of difficulty makes the came much more approachable.


Clothes Pin Spelling


Another quick and easy game that you can adjust as you move through words. I wrote the words clearly on note-cards and wrote a letter on each clothes pin. The child sorts through clothes pins and pin the clothes pin atop the letter. Its also a sneaky way to work on that pincher motion that cause kids to struggle with scissors.

Sight Word Blobber

Instead of just point and read sight words this week - we made it fun! I took some paint I still had out from the mask project and a foam brush. I quickly wrote his words on a paper and armed him with the brush. Whenever I called out the word he had to locate it and SMASH the word with the foam brush. For a kid who thinks he's HULK half the time you can imagine the sound effects! He had so much fun. Its these kind of impromptu activities that makes Homeschooling so worth it for us.

Emotional Understanding

Face Place


Little boys and little girls have some fiery spirits. It's easy to toss up your hands and yell at them for yelling at you. We want to take their toys because they took their siblings and aren't listening. This is neither fair nor effective. So we are trying a new approach. Addressing our emotions. He lashes out and so do we. So this week we took to my camera and made all sorts of faces. We talked about what would cause us to make that face, and how it felt in our hearts. It was an opportunity to talk about calm down methods and to admit that sometimes Mommy doesn't follow those methods, but she does try - and that's the important part. We talked about going to an empty room to take calming breaths and we practiced meditation. We spoke about how sometimes we get angry we forget how to use our words and would rather stomp or yell - and how its important then more than ever to realize and choose a different path.

Math / Arts and Crafts

Paint by Numbers

Worksheets can get dull, so to work on our number recognition we opted to take advantage of the Christmas Clearance (see a pattern here lol) and snag up some paint by numbers for 75% off.

Sorting and Organizing - Animal Families

Before we could do our Animal observation and documentation we had to sort out our African animals from our other animal toys.Chandler took it a step further by sorting the African Animals into family groups. Which led to a discussion about different traits between the parents. He noticed that unlike the white tail deer we have here both adults had horns in a lot of the animals we have. He noticed that male lions have a heavy mane, while Lioness did not. Naturally my little Ninja wasn't happy with sorting them, he had to stack them "so they can have piggy back rides!" 

Music

Song we are learning

Some of Our Favorite Images We Discovered 


NEXT WEEK - JOURNEY INTO AFRICA - THE ANIMALS


Friday, September 5, 2014

FIAR: Daniel's Duck Unit Study


Week One: Daniel's Duck


 Taking place in the 1800s in rural Tennessee. The emotions portrayed in this book will be accessible to every child. Daniel is the youngest child in his family, and wants to make something for the spring fair. Despite some well-intentioned "wait until you're older" discouragement from his family, he carves a duck and is quite proud of it. He brings it to the fair, and then sees people laughing at it. Embarrassed and angry, he grabs his duck and runs to the river to throw it in, but is stopped by the best wood-carver in Tennessee. Their conversation is simple and effective, without being saccharine or artificial. 


Sorting and understanding Rural and Urban:In our FIAR book Daniel's Duck he lived in rural Tenn. We discussed what Rural vs Urban meant and looked through the book to find things that would be found in each place before sorting them on our paper.


Hand prints in our Season Book:
I traced and cut out four of his hand prints on brown paper. Then we discussed the seasons in the story. It begins in fall, goes through a long winter and their is a spring fair. We talked about the changes in the trees and the leaves. Then using paints he applied finger print leaves of the right amount and right color to each tree. 


What is your favorite Season:
He finished by illustrating a tree for his favorite season. He really surprised me with his use of a root system. I love how he blended the colors of the fall leaves into his leaf pile with no direction at all. I love when children are allowed to self teach. It always produces the most surprising work.


Use of quotation marks and a period:
He was asked to write a sentence using both quotation marks and a period. Naturally in free writing he chose to write about the avengers rather than Daniel's duck. I love that is drawing is getting much more detailed. Way to go sweet boy.


Awesome Adjectives:Daniel begins the story very confident in his abilities. He informs his brother that he is designing the duck how he wants and that he knows what to do. Upon submitting it in the fair he  feels very heartbroken when the towns people laugh at his creation. He goes to destroy it. In the 'heat of the moment' he doubts himself, and the quality of work. We used this as a great chance to discuss those 'heat of the moment' situations that Little man encounters daily. Just how Daniel reacted before he understood the intentions of others - how did Little man react to another child who bumped into him. Was it on purpose? Was it intended to be bad? After some insightful  discussions he did a self portrait and created some awesome adjectives that described him.


Favorite part of Daniel's Duck:When asked what was his favorite part of the story, Little man informed me that he most enjoyed the part where Daniel made the duck turn his head backwards. He then competed the question and did a great job illustrating the scene at the fair where the towns people first saw his duck.


Today I discovered:It is always important to make discoveries from each new book. Little man discovered that in the 1800s people rarely went to the store to buy things if they could make it themselves. He learned that father make shoes, Mother make quilts, brother made bowls and boxed and Daniel made a toy duck. He simplified this statement by writing that he discovered - people carved wood.


Season Sorting:
Little Man was given several cut outs and asked the glue them during the season that it was most likely to have taken place. He did a really good job. He pointed out that while I had bee's for spring - they could also be seen in summer. He made many good observations during this assignment.


Tennessee Lapbook:We made a simple lapbook about Tennessee which contained the state bird, state flower and state flag. We colored in Tennessee on the map of the united states as well as a colored the shape of Tennessee. We also added a flipbook of basic facts.


Rebuild Daniel's Cabin:For a longterm project over several days he created Daniel's cabin.He completed it with a chimney and land for it to sit on. While it was unlikely that his cabin was painted Little Man took pride in mixing colors to create the perfect cabin. It turned into an impromptu mixing colors lesson. What fun!


We also carved soap but I forgot to take pictures. Thank you for reading. Next week we will be rowing...


Saturday, June 14, 2014

Summer Reading Program

Summer Reading Program!

I was really bummed out to find out that our local library wasn't doing a reading program this year. So we devised our own. We are a family of readers. ( even those of us still learning!) We love to read!  Chandlers love of books has expanded into a love of counting in the past few days. He has mastered counting by tens to one hundred so we worked the golden number of 100 into our reading program.

I printed out a picture on cardstock with 100 books on it. We put it on the fridge for easy access and will cross one book off for every book we read.


Chandler has become very excited lately about writing, but not repetitive letters. So we decided to make a few book reflections. That way he can practice his letters in the title area, but not feel forced to write out a large amount of information. I want to keep the writing fun, and part of the adventure.  I also added a large section for him to illustrate the plot of the story. On the bottom I added a few emotional faces to lead into discussions about how the characters felt during the story.


Upon completion of each row of books he will get a small treat from our prize box. Just as they do in the summer reading program. When he finishes all the books he will have a ice cream party with friends!

I was a little sad at first hearing the program was closed but after creating our own - I am really excited!

                         Happy Reading everyone!


I am trying to  find a way to make files available for  you to use. If you would like me to email these printables to you I will happily do so!


Sink or Float

Total cost: - Free
Total Time: 10 -15 Minutes
Directions:
Chandler and I selected things from around the house to test which would sink and which would float.  I drew a vase on cardstock and printed out pictures of the items he selected.

Step 1  : Fill clear container with water.
Step 2: have child take printed picture and put it where he thinks it belongs. Will it sink or float.
Step 3: Drop the real item in the water.
Step 4:  Glue the picture where it went.

How did you do?

A little drawing and clip art for a nice free project!

He was right!

Make a guess, then do a test! Document your findings!

Coins sink!

The only one he got wrong was ice. He is trying to put the car on it to make it sink. Still wrong, but I love his outside of the box thinking!

Finished! He had so much fun with this project!

Chandler did great, the only one he missed was an ice cube. He then tried to sit the car on it to make it sink, so he could still be correct. Love the outside of the box thinking!

Friday, June 13, 2014

Stingray Growth Project

I had been wanting to introduce measurement and charting to my little man but wanted a way to engage him and keep it both project based and hands on. It was on a visit to the local dollar store that Chandler answered the question for me. He found a stingray and showed it to me. What he didn't realize is that it was one of the grow-in-water toys. So we spent the dollar and home we returned to discover what would happen to this little stingray as we exposed him to water.

STING RAY GROWTH PROJECT:
1 - Trace a grow in water animal.
2- Measure it with yarn.
3- Cut the yarn to the same length.
4- Measure the string 
5- Document the length.
6- Put in water for 3 days
7 - Repeat process
8- Document growth.

Skill sets: Measuring, Science, Scissor skills, Glue skills, Charting, Observation

Cost: $1.00

Tracing the original stingray before we put it in the water.


Measure and cut yard the length of the stingray.

Apply glue for our yarn

Glue yarn

Measure the yarn and document the findings.

Put the stingray into a bath or shoebox of water. Make sure it has room to grow.

Three days later we traced the grown stingray, and measured the yarn again.

It has grown!

Every scientist must document their discoveries!

Finished project!